How to Install a Rear Disc Brake Conversion on a Classic Mustang
Upgrading to rear disc brakes is one of the best improvements you can make to a classic Mustang.
But like most swaps, the difference between a clean install and a frustrating one comes down to understanding the process before you start.
This guide walks through the key steps of a rear disc brake conversion, along with a few things to watch for along the way.
What You’re Actually Doing
At a high level, a rear disc conversion involves:
Removing factory drum brakes
Installing caliper brackets and rotors
Mounting calipers and brake lines
Bleeding and balancing the system
While it’s a bolt-on upgrade, there are a few critical steps that make or break the final result.
Step 1: Remove the Factory Drum Setup
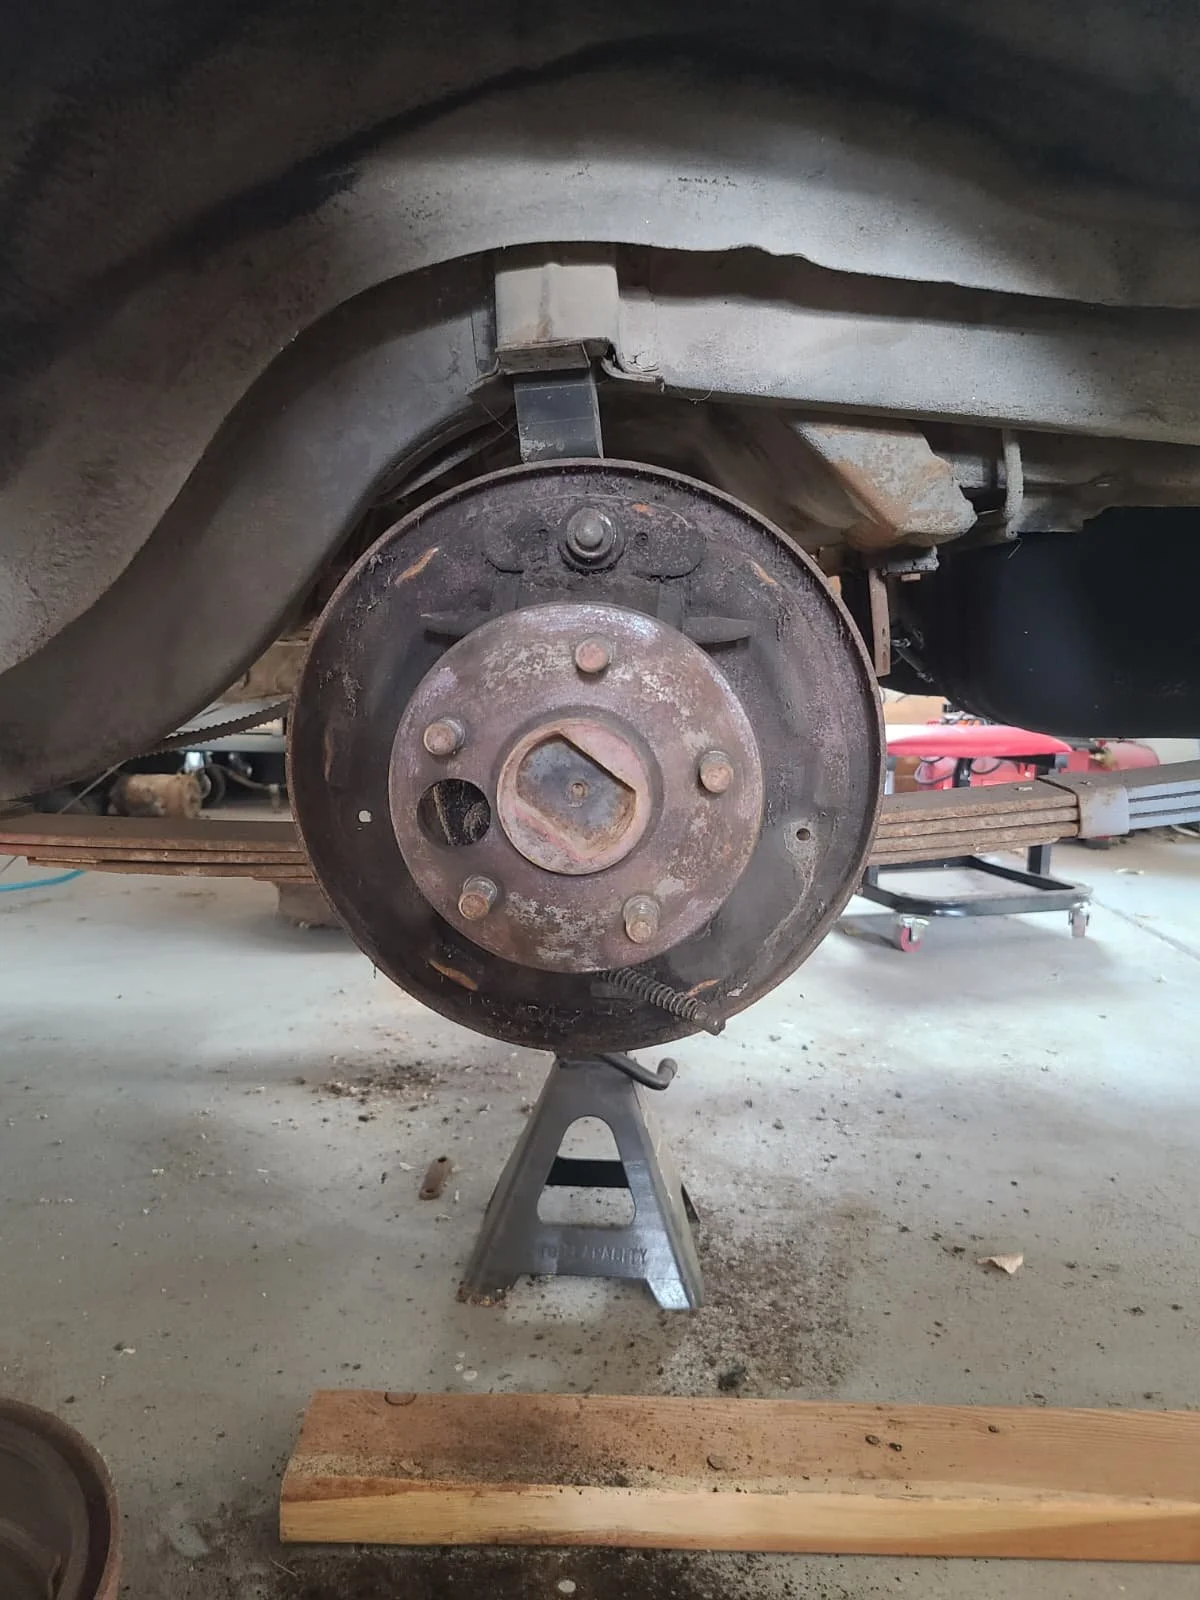
Start by removing:
Wheels and drums
Brake shoes and hardware
4 bolts holding on the axle retainer and drum backing plate
From there:
Slide the axles out
Remove drum backing plate
Thoroughly clean axle housing
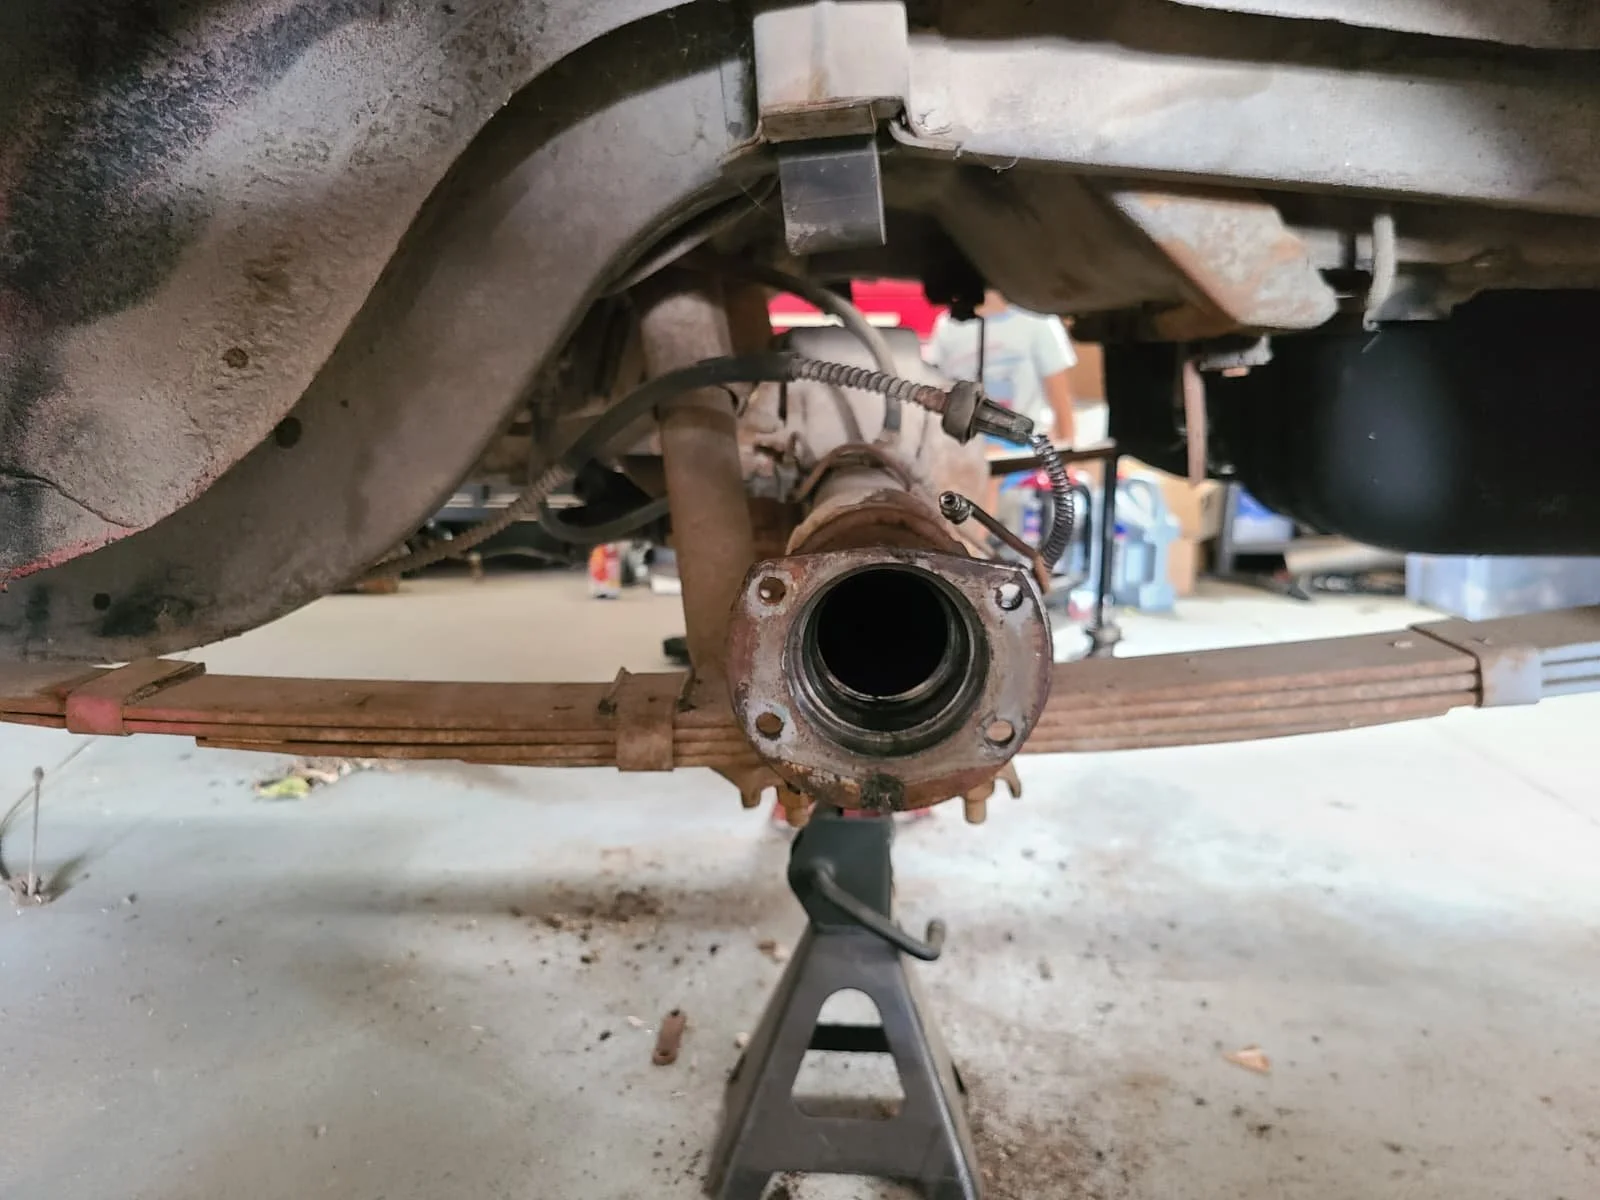
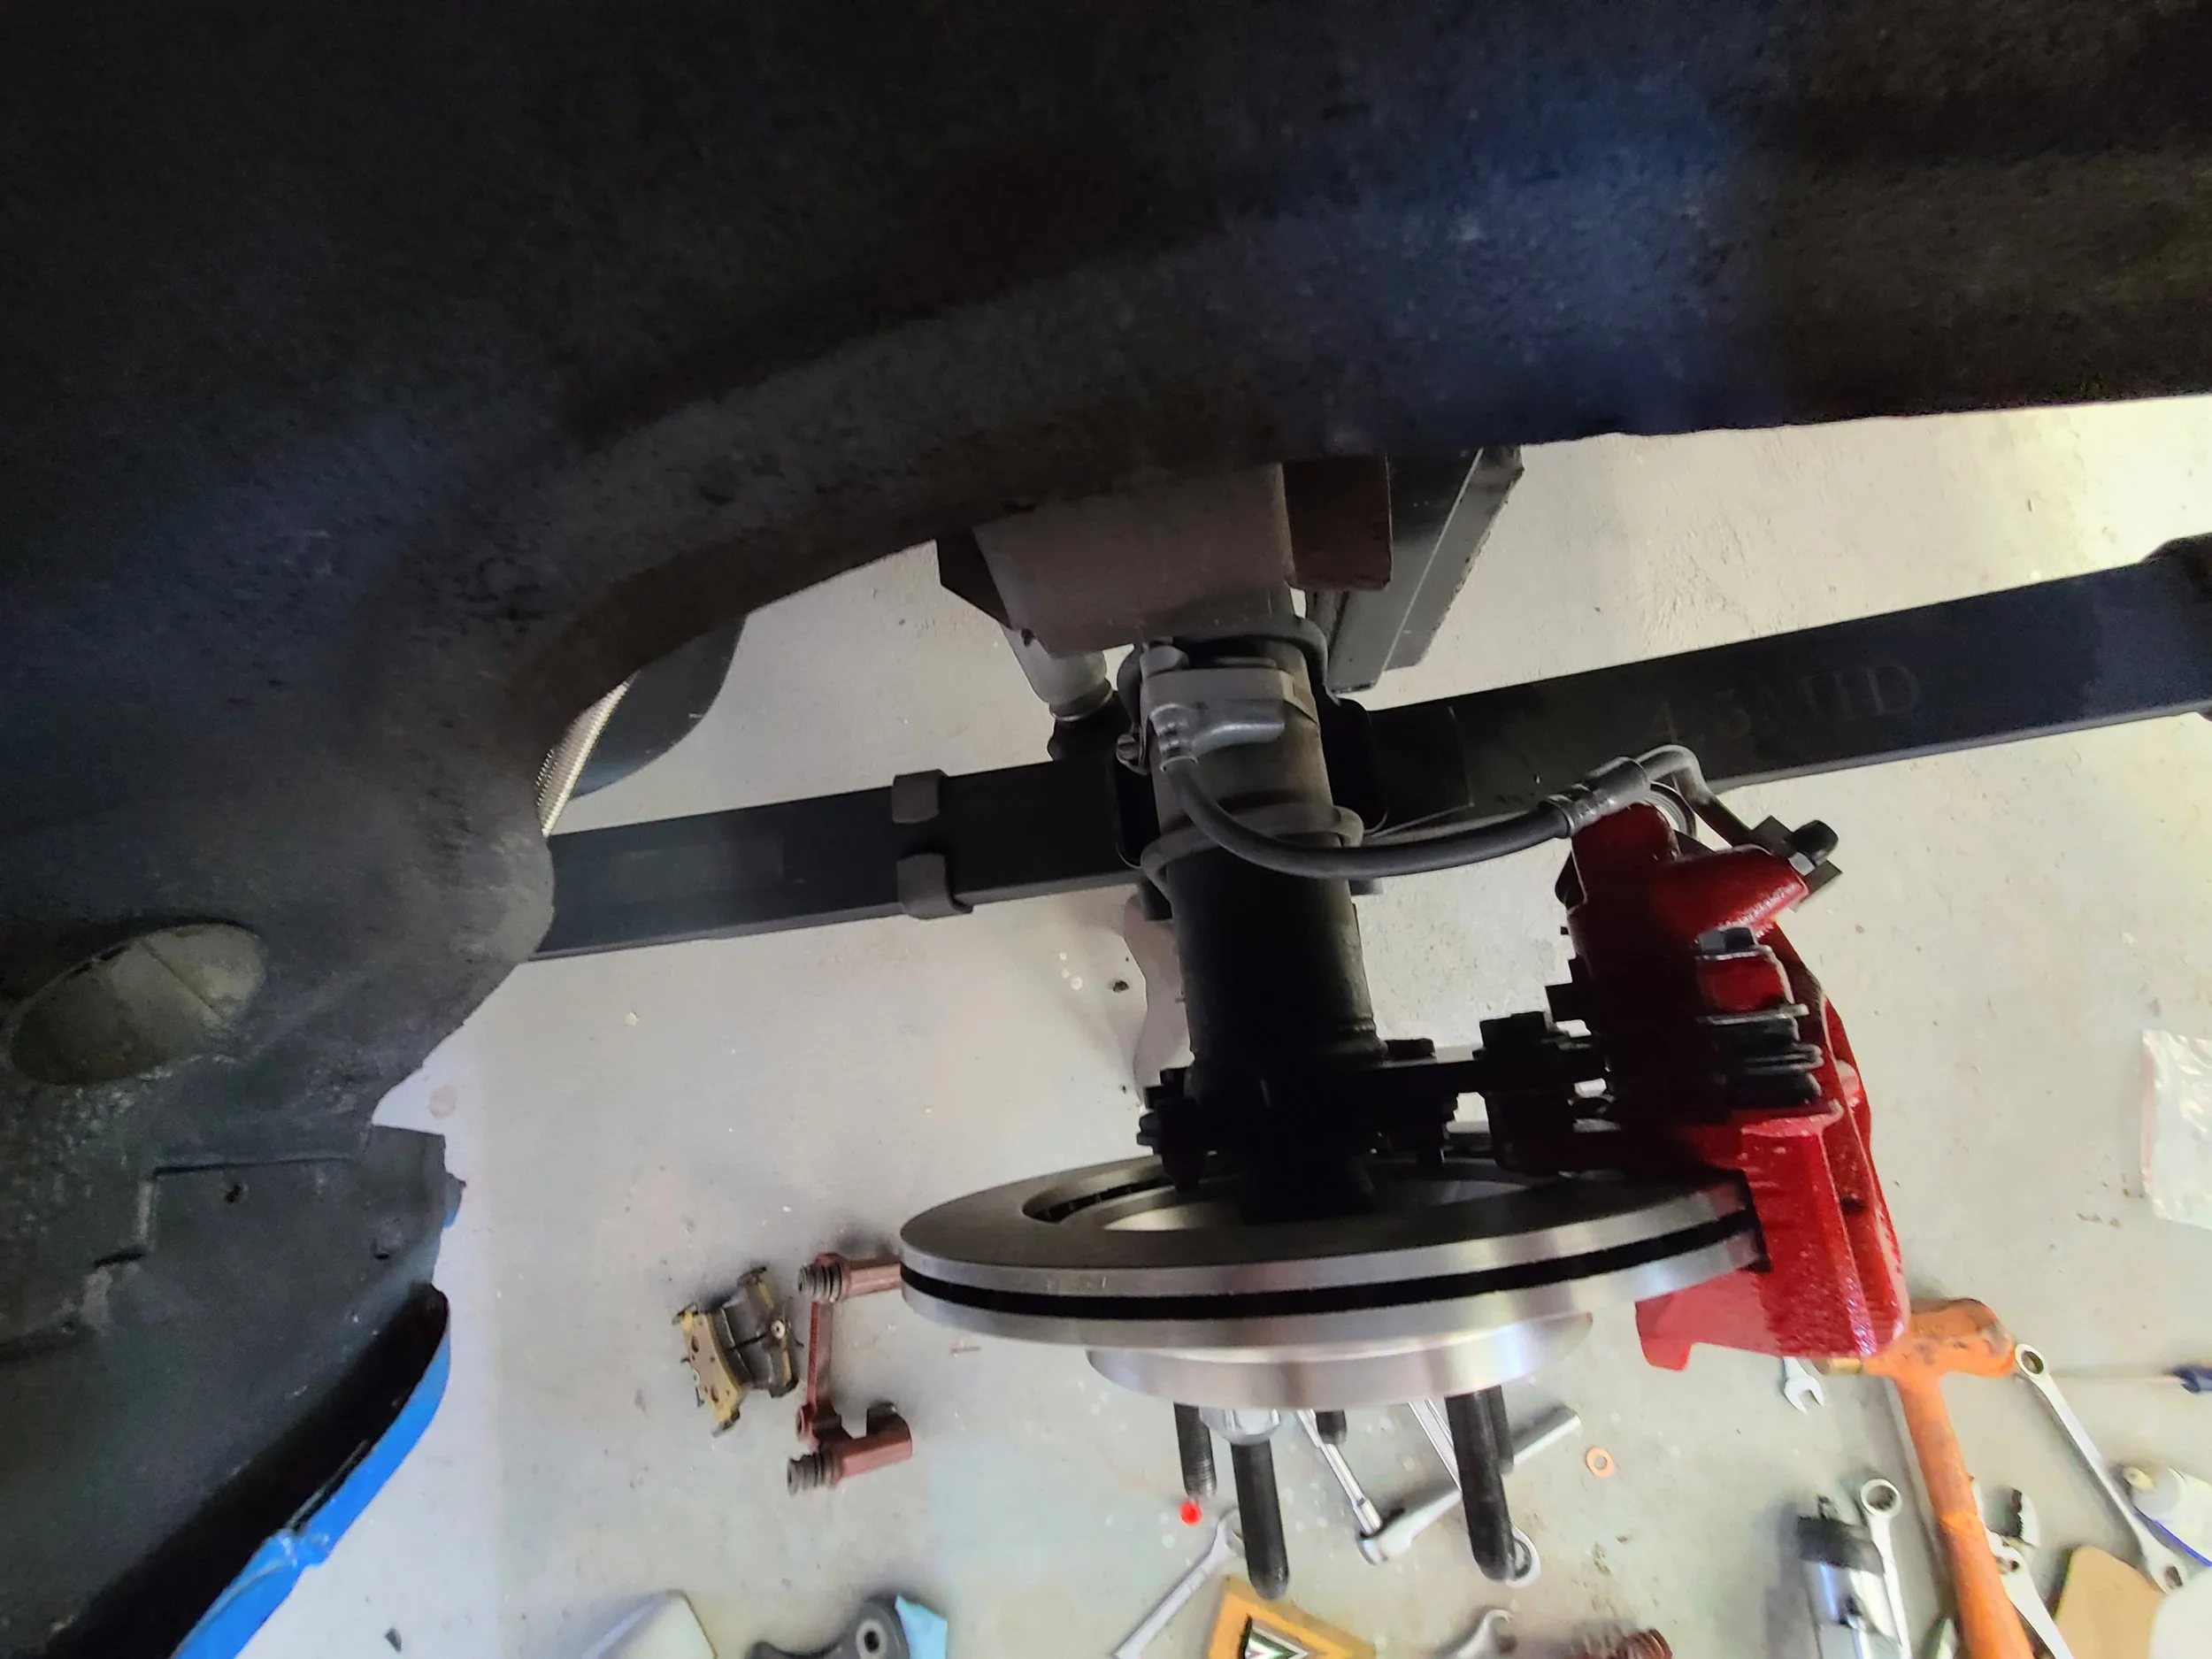
Step 2: Install Caliper Brackets

With the axle housing cleared:
Install your caliper mounting brackets
Ensure correct orientation (Caliper brackets mount on the rear of the axle)
Place backing plate spacers on axle housing
Slide axles into the axle housing
Torque hardware properly
This is one of the most important steps:
👉 The bracket determines caliper alignment and rotor position
Some setups may require shims to properly center the rotor in the caliper.
Step 3: Install Rotors
Place centric rings over axle hub
Install the brake rotors
Use lug nuts temporarily to hold them in place
Make sure:
The rotor spins freely
There is no interference
Step 4: Install Calipers and Pads
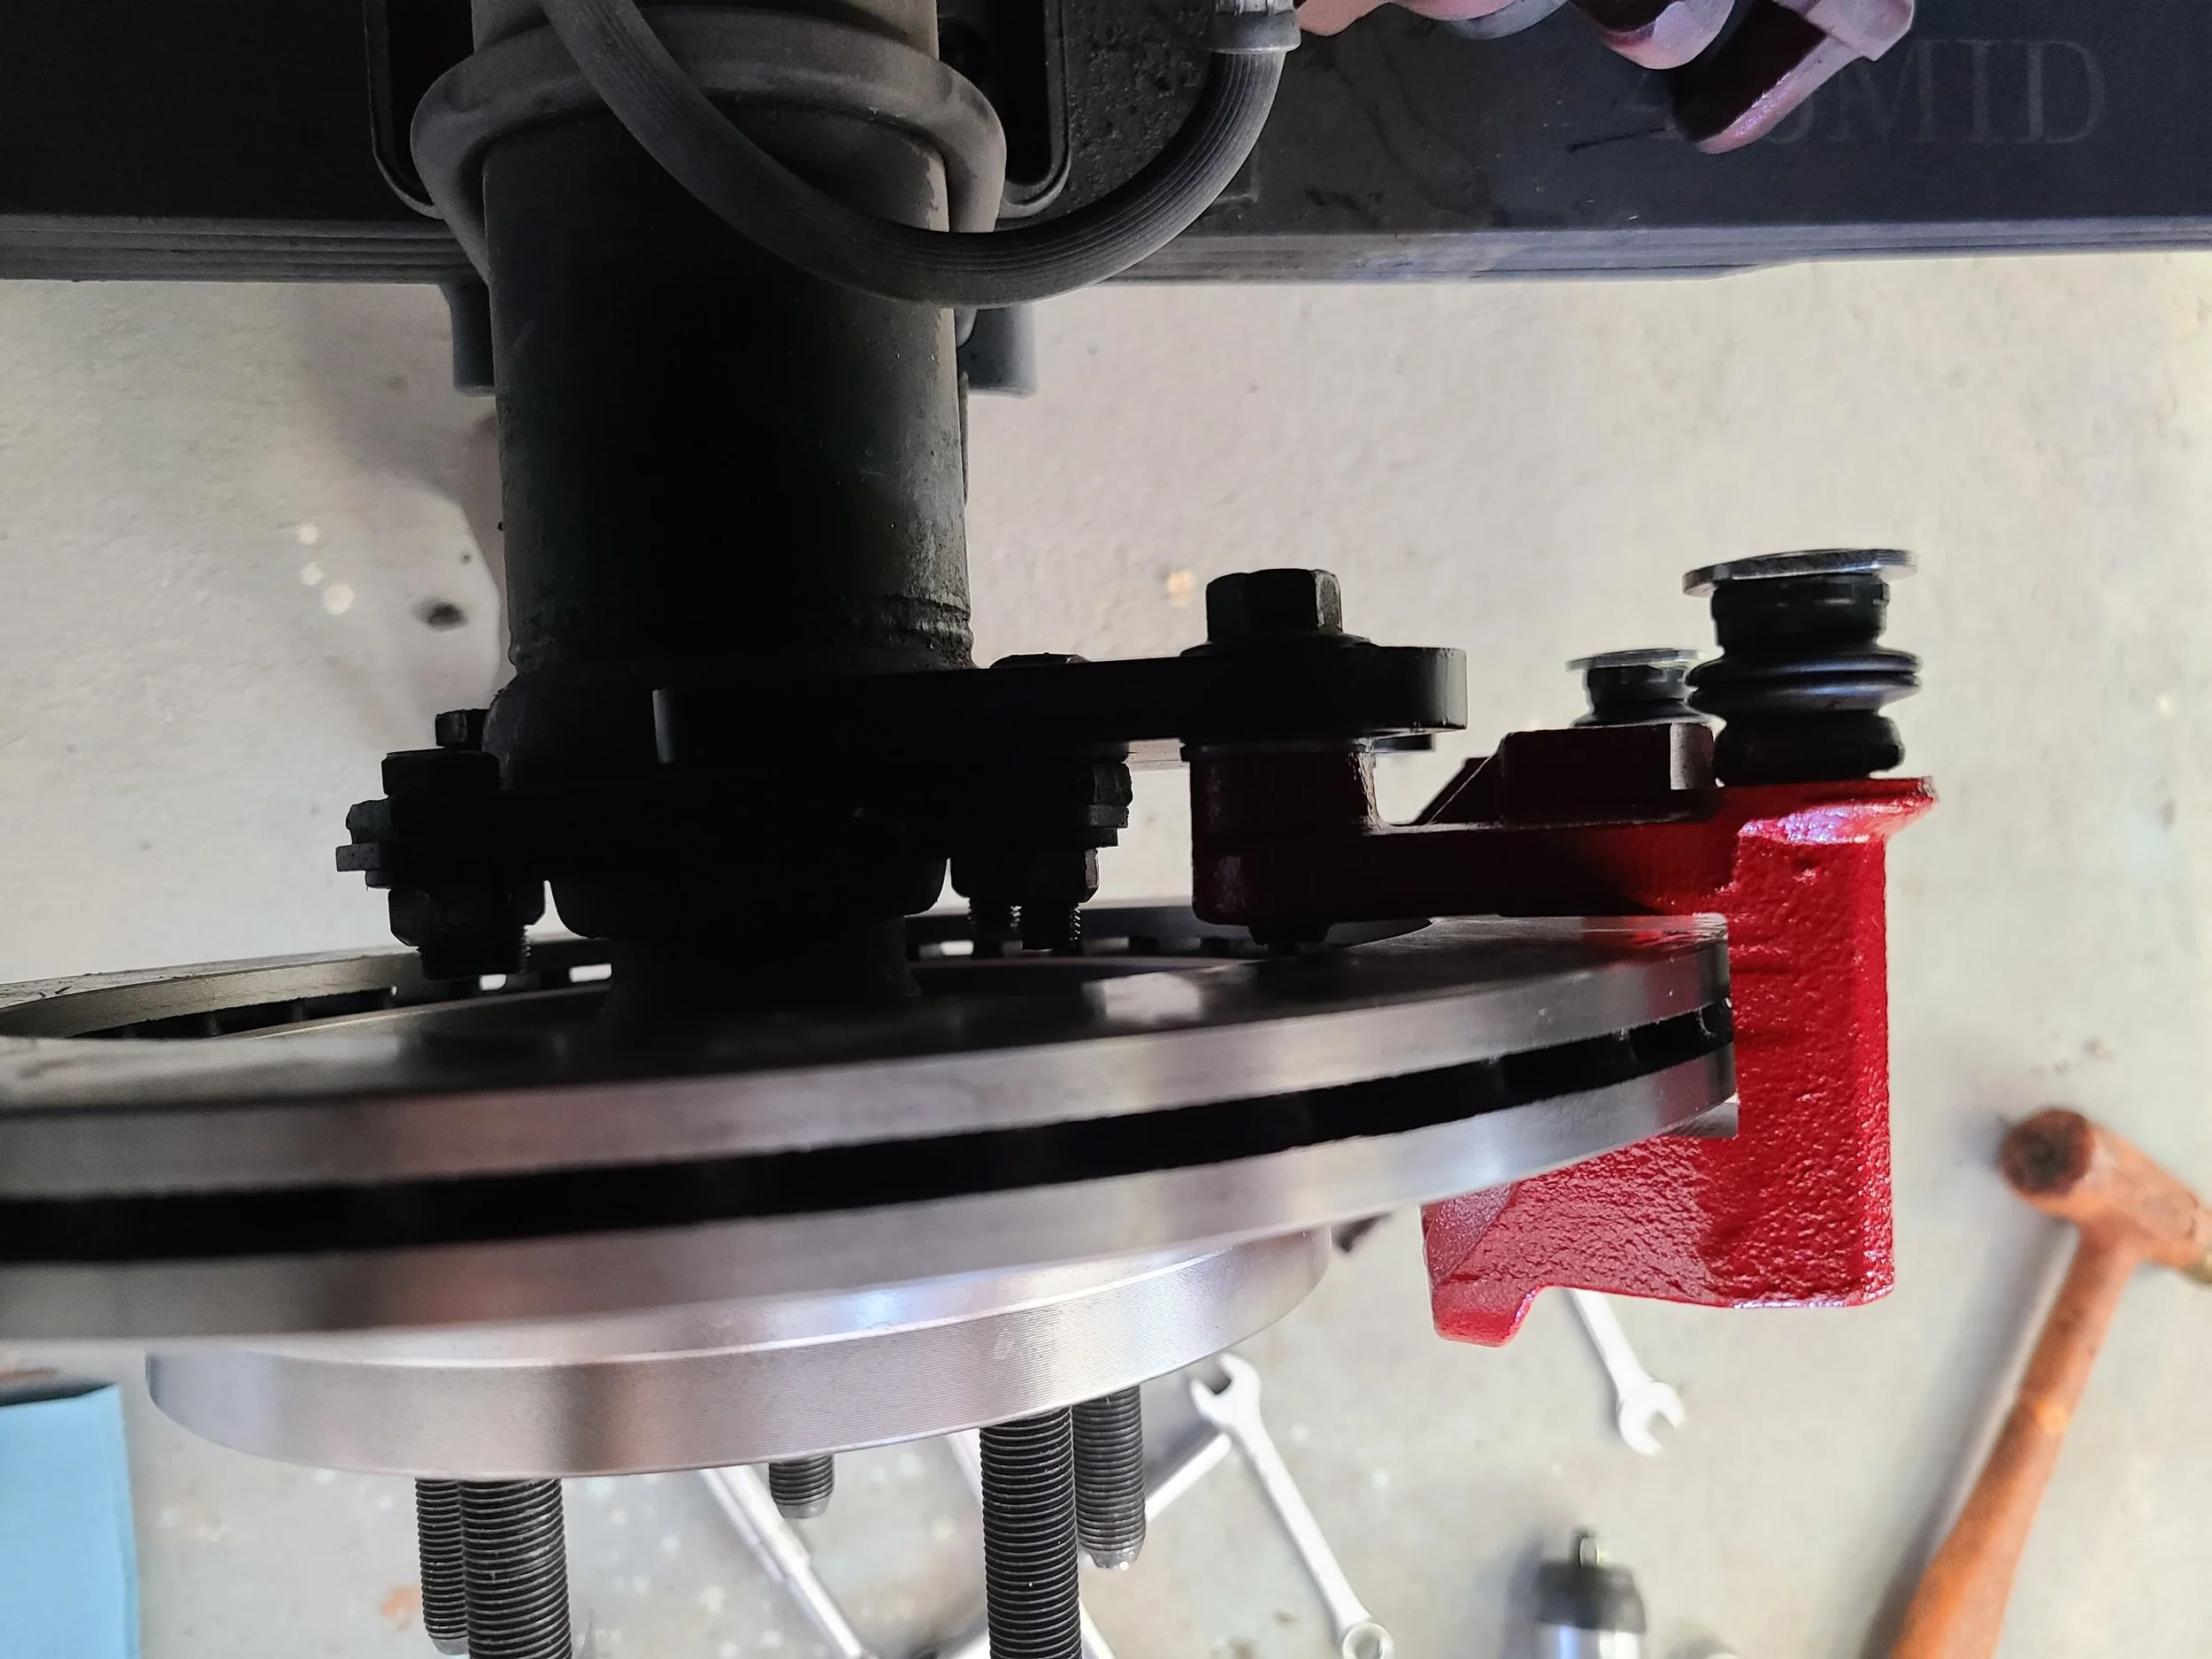
Now install:
Brake pads into the caliper brackets
Calipers over the rotor
Before tightening everything down:
Confirm the rotor is centered
Adjust with shims if needed
Apply grease to:
Pad contact points
Caliper slide areas
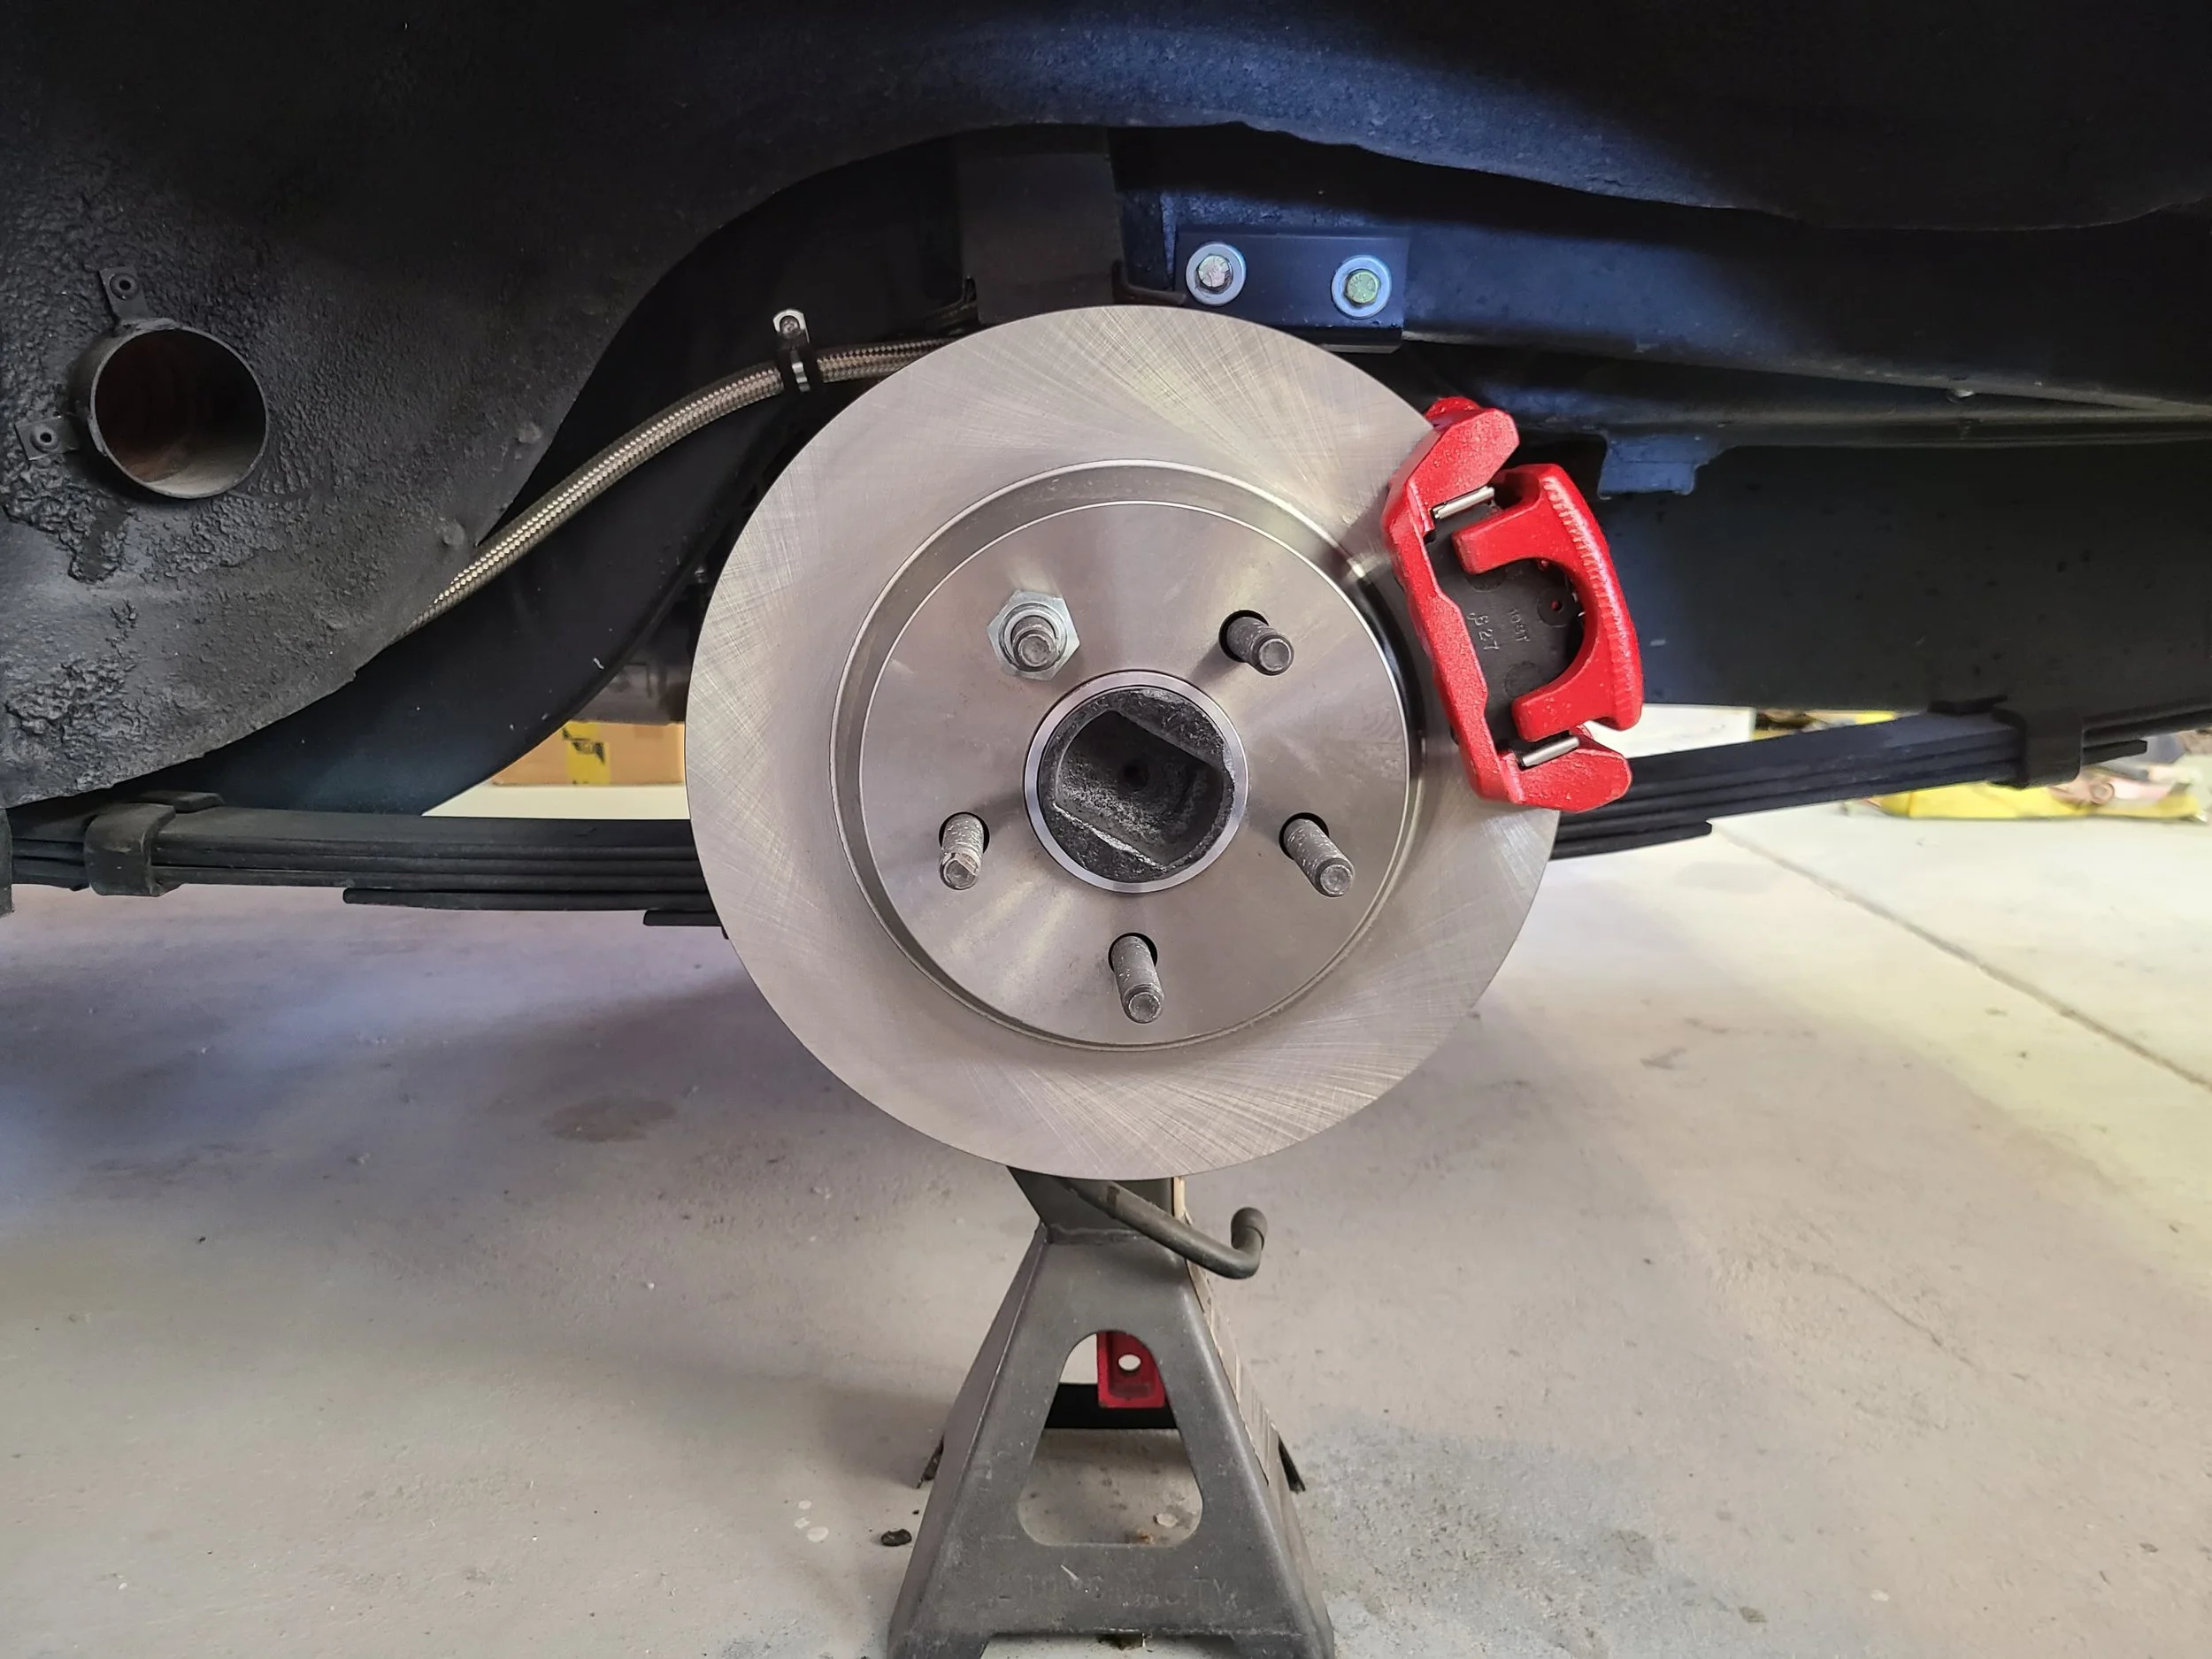
Step 5: Connect Brake Lines
Install:
Brake hoses to the calipers (using banjo bolts + crush washers)
Hard lines to the axle (factory lines can be shortened (or bent in a loop) and using an M10x1 bubble adapter can be connected to the caliper hose. Alternatively, new hard lines can be bent with the correct bubble fitting already installed.
I like to cut part of the mounting bracket off the SN95 caliper hose and then use a hose clamp to secure it to the axle.
Make sure:
Lines are routed cleanly
No interference with suspension or axle movement
All fittings are properly tightened
Improper routing here can cause long-term issues.
Step 6: Bleed the Brakes
Once everything is installed:
Fill the master cylinder
Bleed in proper order:
Passenger rear
Driver rear
Passenger front
Driver front
Repeat until:
No air remains
Pedal feels firm
Step 7: Check Brake Balance
Rear disc conversions change brake bias.
To correct this:
Install or adjust a proportioning valve
Start conservative and adjust as needed
This ensures:
Stable braking
Proper front-to-rear balance
Common Mistakes to Avoid
Not centering the caliper over the rotor
Poor brake line routing
Running mismatched front and rear setups
Not addressing brake bias
Final Thoughts
A rear disc conversion isn’t just about better parts — it’s about building a system that works together.
Take your time during installation, double-check alignment and routing, and make sure everything is properly adjusted.
When done right, the result is:
Better performance
Easier maintenance
Less brake fade
Better wet-weather stopping
Improved consistency
More confidence behind the wheel
Pro Tip
If you're building a complete system, make sure your rear brakes match your front setup.
Brake balance matters more than brake size — and getting that right is what separates a good setup from a great one.